Installing and Using UpLync Softphone (Mobile)
UpLync Softphone turns your mobile device into your business phone. You can make and receive calls, send messages, check voicemail, and manage your availability from anywhere using your business number.
Logging Into UpLync Softphone
- Download the UpLync Softphone app from your app store:
- Open the app and log in using the credentials or QR code you received via email from UpLync.
- Once logged in:
- A green indicator means you are ready to make and receive calls
- A red indicator means the app is not registered (Double-check your login details. If the issue continues, contact support@uplync.com.)
Navigating the App
The main navigation is located at the top of the screen:

- Dialpad – Make calls
- History – View recent calls
- Quick Dial – Access saved contacts
- Contacts – Search and manage contacts
- Messaging – Send and receive text messages
- Toolbox – Access voicemail, recordings, and settings

Note: Some users may have a paired account, which includes both a desk phone and a softphone extension that work together. If you notice multiple extensions or slightly different behavior in certain features, this is expected. You can learn more here: Understanding Your Extensions (Paired Accounts).
Syncing Your Contacts
You can sync your Google or Office 365 contacts directly into the app.
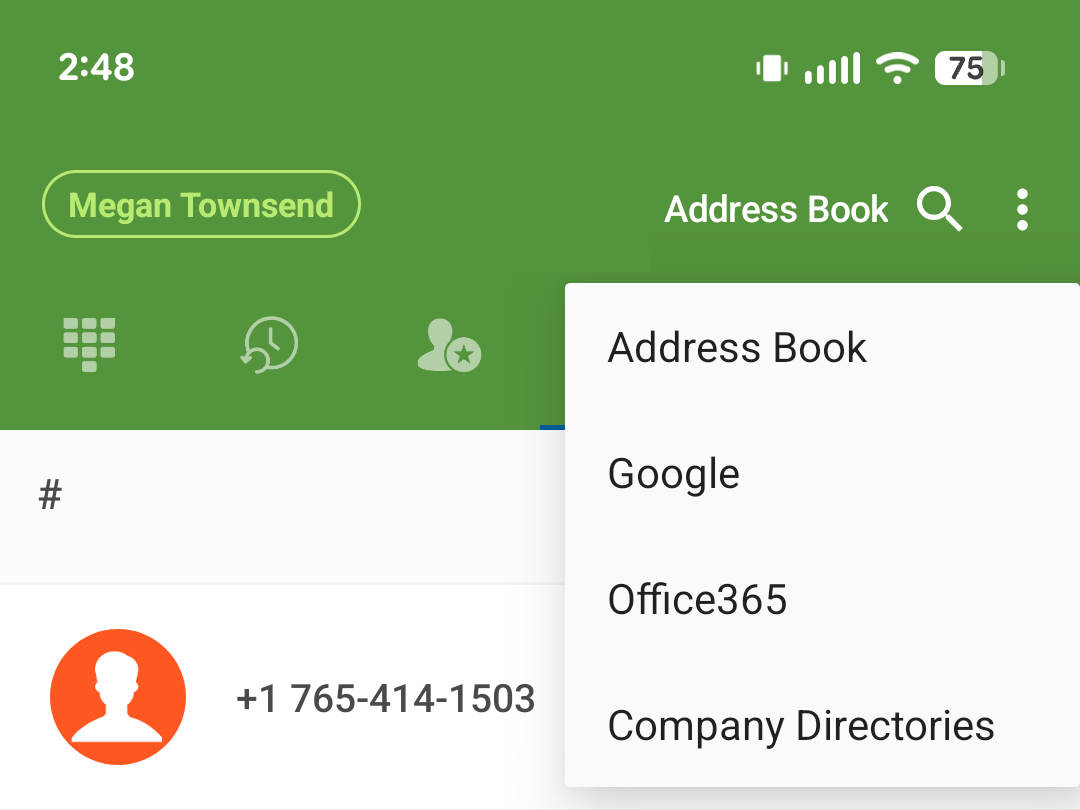
- Tap the Contacts tab
- Tap Address Book
- Select:
- Office 365
- Follow the prompts to sign in
Once connected, your contacts will appear in your contact list and can be used for calling and messaging.
Making a Call
There are a few ways to place a call.
Using the Dialpad
- Tap the Dialpad tab
- Enter a phone number or extension
- Press the green call button
Using Contacts
- Tap Contacts or Quick Dial
- Select a contact
- Tap the phone icon
Answering a Call
When you receive a call, tap the Answer button on your screen to connect.
During a Call
While on a call, you have several options available:
- Keypad – Enter digits for menus or extensions
- Hold – Place the caller on hold
- Transfer – Send the call to another user or number
- Add Call – Start a second call
- Attended Transfer – Speak to the recipient before completing the transfer
Transferring a Call
You can transfer a call to another user or phone number in two different ways, depending on whether you want to speak with the recipient first.
Unattended Transfer
An unattended transfer sends the call directly to the other person without speaking to them first.
- While on a call, tap Transfer
- Enter the extension or phone number
- Or select a contact from your list
- Tap the call button to complete the transfer
Attended Transfer
An attended transfer allows you to speak with the recipient before completing the transfer.
- While on a call, tap Attended Transfer
- Enter the extension or phone number
- Or select a contact from your list
- Speak with the recipient
- Complete the transfer after speaking with them
Transfer to Voicemail
You can transfer a call directly to the recipient's voicemail box without ringing the phone first.
- While on a call, tap Transfer
- Dial * followed by the extension (e.g., *1001)
- Tap Transfer again to complete the call
Messaging
You can send and receive text messages using your business number. Each message shows the name of the user who sent it, making it easy to track conversations across your team.
- Tap the Messaging tab
- Select an existing conversation or start a new one
- Enter your message and send
Voicemail
- Tap the Toolbox tab
- Select Visual Voicemail
From here you can:
- Listen to messages
- View voicemail transcriptions
- Record your name and unavailable or temporary greetings
- Manage your voicemail-to-email delivery settings
Call Recordings and Transcripts
- Tap the Toolbox tab
- Select Call Recordings & Transcripts
From here you can:
- Play recorded calls
- View call details
- Read available transcripts
Managing Do Not Disturb and Call Routing
- Tap the Toolbox tab
- Select Follow Me / DND
From here you can:
- Enable or disable Do Not Disturb
- Control how calls are routed to your devices
Note: Paired accounts may see additional options here, since settings can apply to your desk phone and softphone separately.
Messaging Settings and Auto-Replies
- Tap the Toolbox tab
- Select Messaging Settings
From here, you can manage:
- Messaging preferences
- Automatic replies
- Reply templates
Troubleshooting
- If you are unable to make or receive calls, check that your status indicator is green
- Make sure you are connected to Wi-Fi or cellular data
- Refer to the Help & FAQ section in the Toolbox tab
- If issues continue, contact support@uplync.com
Related Articles
Installing and Using UpLync Softphone (Desktop - Mac)
UpLync Softphone for Mac UpLync Softphone cuts the ties to the physical phone sitting on your desk. Available for mobile and desktop, the UpLync Softphone app immediately transforms your personal device into your business office extension. You can ...Installing and Using UpLync Softphone (Desktop - Windows)
UpLync Softphone allows you to use your computer as your business phone. You can make and receive calls, send messages, check voicemail, and manage your availability directly from your desktop. Logging Into UpLync Softphone Install UpLync Softphone ...Softphone Basics
What are the main areas of the softphone? The softphone includes six main areas: Dialpad: Place calls History: View recent calls Quick Dial: Access saved favorites Contacts: Search and manage contacts Messaging: Send and receive text messages ...Getting Started with UpLync Fax
Getting Started with UpLync Fax The UpLync Fax portal works similarly to your email. Here are a few items to consider before sending your first fax message. Review and update your user profile and general settings Create a default cover page Add ...UpLync Fax FAQs
I forgot my username and/or password. How can I find them? Open your web browser and navigate to http://faxlync2.uplync.net Click the blue Forgot Password? link. You can also email support@uplync.com for assistance. Does everyone use the same login ...